 English
 Español
  Português
  русский
  Français
  日本語
日本語  Deutsch
  tiếng Việt
  Italiano
  Nederlands
  ภาษาไทย
  Polski
  한국어
한국어  Svenska
  magyar
  Malay
Malay  বাংলা ভাষার
  Dansk
Dansk  Suomi
Suomi  हिन्दी
  Pilipino
  Türkçe
  Gaeilge
  العربية
  Indonesia
  Norsk
Norsk  تمل
تمل  český
český  ελληνικά
  український
  Javanese
  فارسی
فارسی  தமிழ்
தமிழ்  తెలుగు
  नेपाली
  Burmese
  български
  ລາວ
ລາວ  Latine
  Қазақша
  Euskal
  Azərbaycan
  Slovenský jazyk
  Македонски
  Lietuvos
  Eesti Keel
  Română
  Slovenski
  मराठी
मराठी  Srpski језик


Wafer Butterfly အဆို့ရှင်၏တပ်ဆင်ခြင်းလုပ်ထုံးလုပ်နည်း
2021-05-02
အပေါ်ကလစ်၏မှန်ကန်သောတပ်ဆင်လိပ်ပြာအဆို့ရှင် is related to the sealing degree of the လိပ်ပြာအဆို့ရှင် and whether it will leak, including the safety in the working condition. The user should understand the installation process.
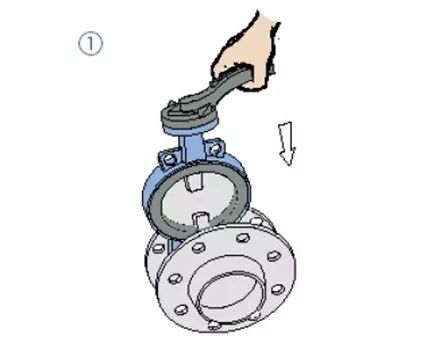
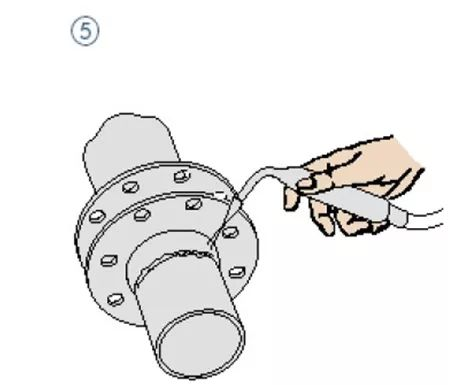
ပုံ -၁ တွင်ပြထားသည့်အတိုင်းကြိုတင်တပ်ဆင်ထားသည့်အနားကွပ်နှစ်ခုကြားရှိအဆို့ရှင်ကိုထားပါ။
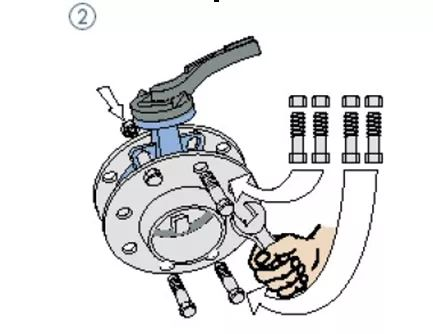
2. သော့ခလောက်နှင့်အခွံမာသီးလေးခုကိုအနားကွပ်အတွင်းသို့ညင်ညင်သာသာထည့်ပါ။
၃။ အနားကွပ်ကိုပိုက်ပေါ်တွင်အစက်အပြောက်ဖြင့်ဂဟေဆော်ခြင်းဖြင့်တပ်ဆင်သည်။
4. အဆို့ရှင် Remove;
၅။ အနားကွပ်ကိုဂဟေဆော်ပြီးပိုက်ပေါ်တွင်တပ်ထားသည်။
6. ဂဟေအအေးပြီးနောက်အဆို့ရှင် Install ။ အဆို့ရှင်ပျက်စီးခြင်းမှကာကွယ်ရန်အဆို့ရှင်တွင်အနားထဲတွင်နေရာအလုံအလောက်ရှိမရှိစစ်ဆေးပါ။
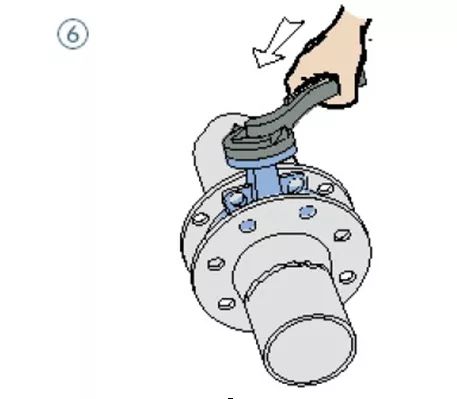
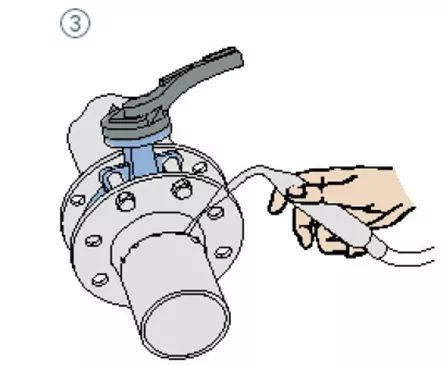
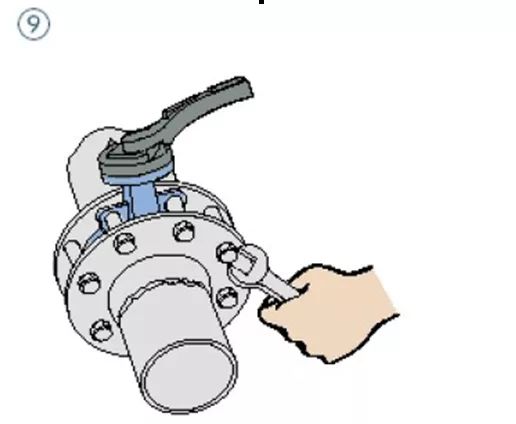
7. အဆို့ရှင်၏အနေအထားကိုပြင်ပေးနှင့်သော့ခလောက်လေးအားလုံးအတွက်တင်းကျပ်။
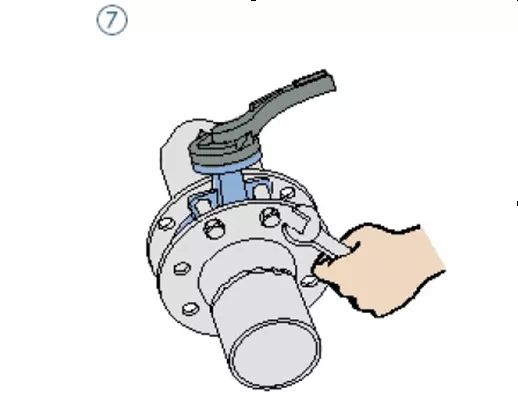
၈ ။
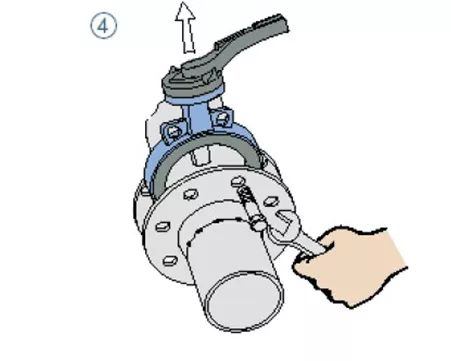
9. လက်ဝါးကပ်တိုင်အညီအမျှအားလုံးအခွံမာသီးတင်းကျပ်;
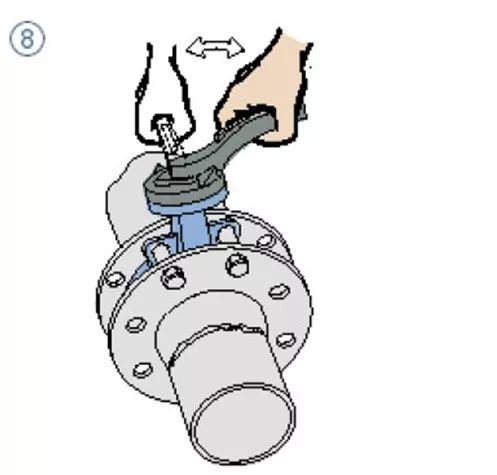
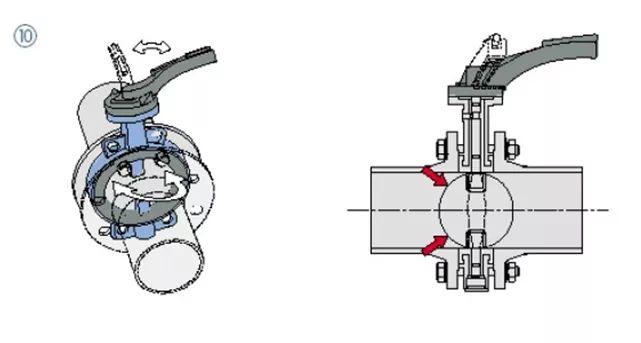
၁၀။ အဆို့ရှင်သည်ပွင့်လင်း။ ပိတ်နိုင်သည်ဟုထပ်မံအတည်ပြုပါ။ မှတ်ချက် - အဆို့ရှင်ပန်းကန်သည်ပိုက်နှင့်မထိရန်သေချာစေပါ။
The installation of the clip type လိပ်ပြာအဆို့ရှင် must be placed flat before installation. Remember not to bump at will. After pulling it to the length of installation, the clip type လိပ်ပြာအဆို့ရှင် can not be disassembled at will without special permission in the field pipeline design. At the same time, the clip on လိပ်ပြာအဆို့ရှင်မည်သည့်အနေအထားတွင်မဆိုတပ်ဆင်နိုင်သည်, ဒါပေမယ့်အပေါ်ကလစ်၏တပ်ဆင်ပြီးနောက်လိပ်ပြာအဆို့ရှင်ပြီးစီးခဲ့သည်လိပ်ပြာအဆို့ရှင်မျဉ်းတစ်လျှောက်တွင်ထားရန်လိုအပ်ပြီး၊ ဗီဒီယိုကလစ်အတွက်လည်းအထောက်အပံ့ပေးသည်လိပ်ပြာအဆို့ရှင်။ Support လုပ်သည်နှင့်တပြိုင်နက်၎င်းကိုအသုံးပြုသောအခါထောက်ခံမှုကိုဖယ်ရှားပစ်ရန်လုံးဝတားမြစ်သည်။


We use cookies to offer you a better browsing experience, analyze site traffic and personalize content. By using this site, you agree to our use of cookies.
Privacy Policy